My Homelab hardware for self-hosting
I recently started to look into self-hosting certain services to increase privacy and, most importantly, have fun along the way. I generally work on the Linux kernel for my day job; while exciting, I don’t get to use Linux where it shines the most: as a server.
This article will cover my Hardware setup for my Homelab and its bringup.
Humble beginning
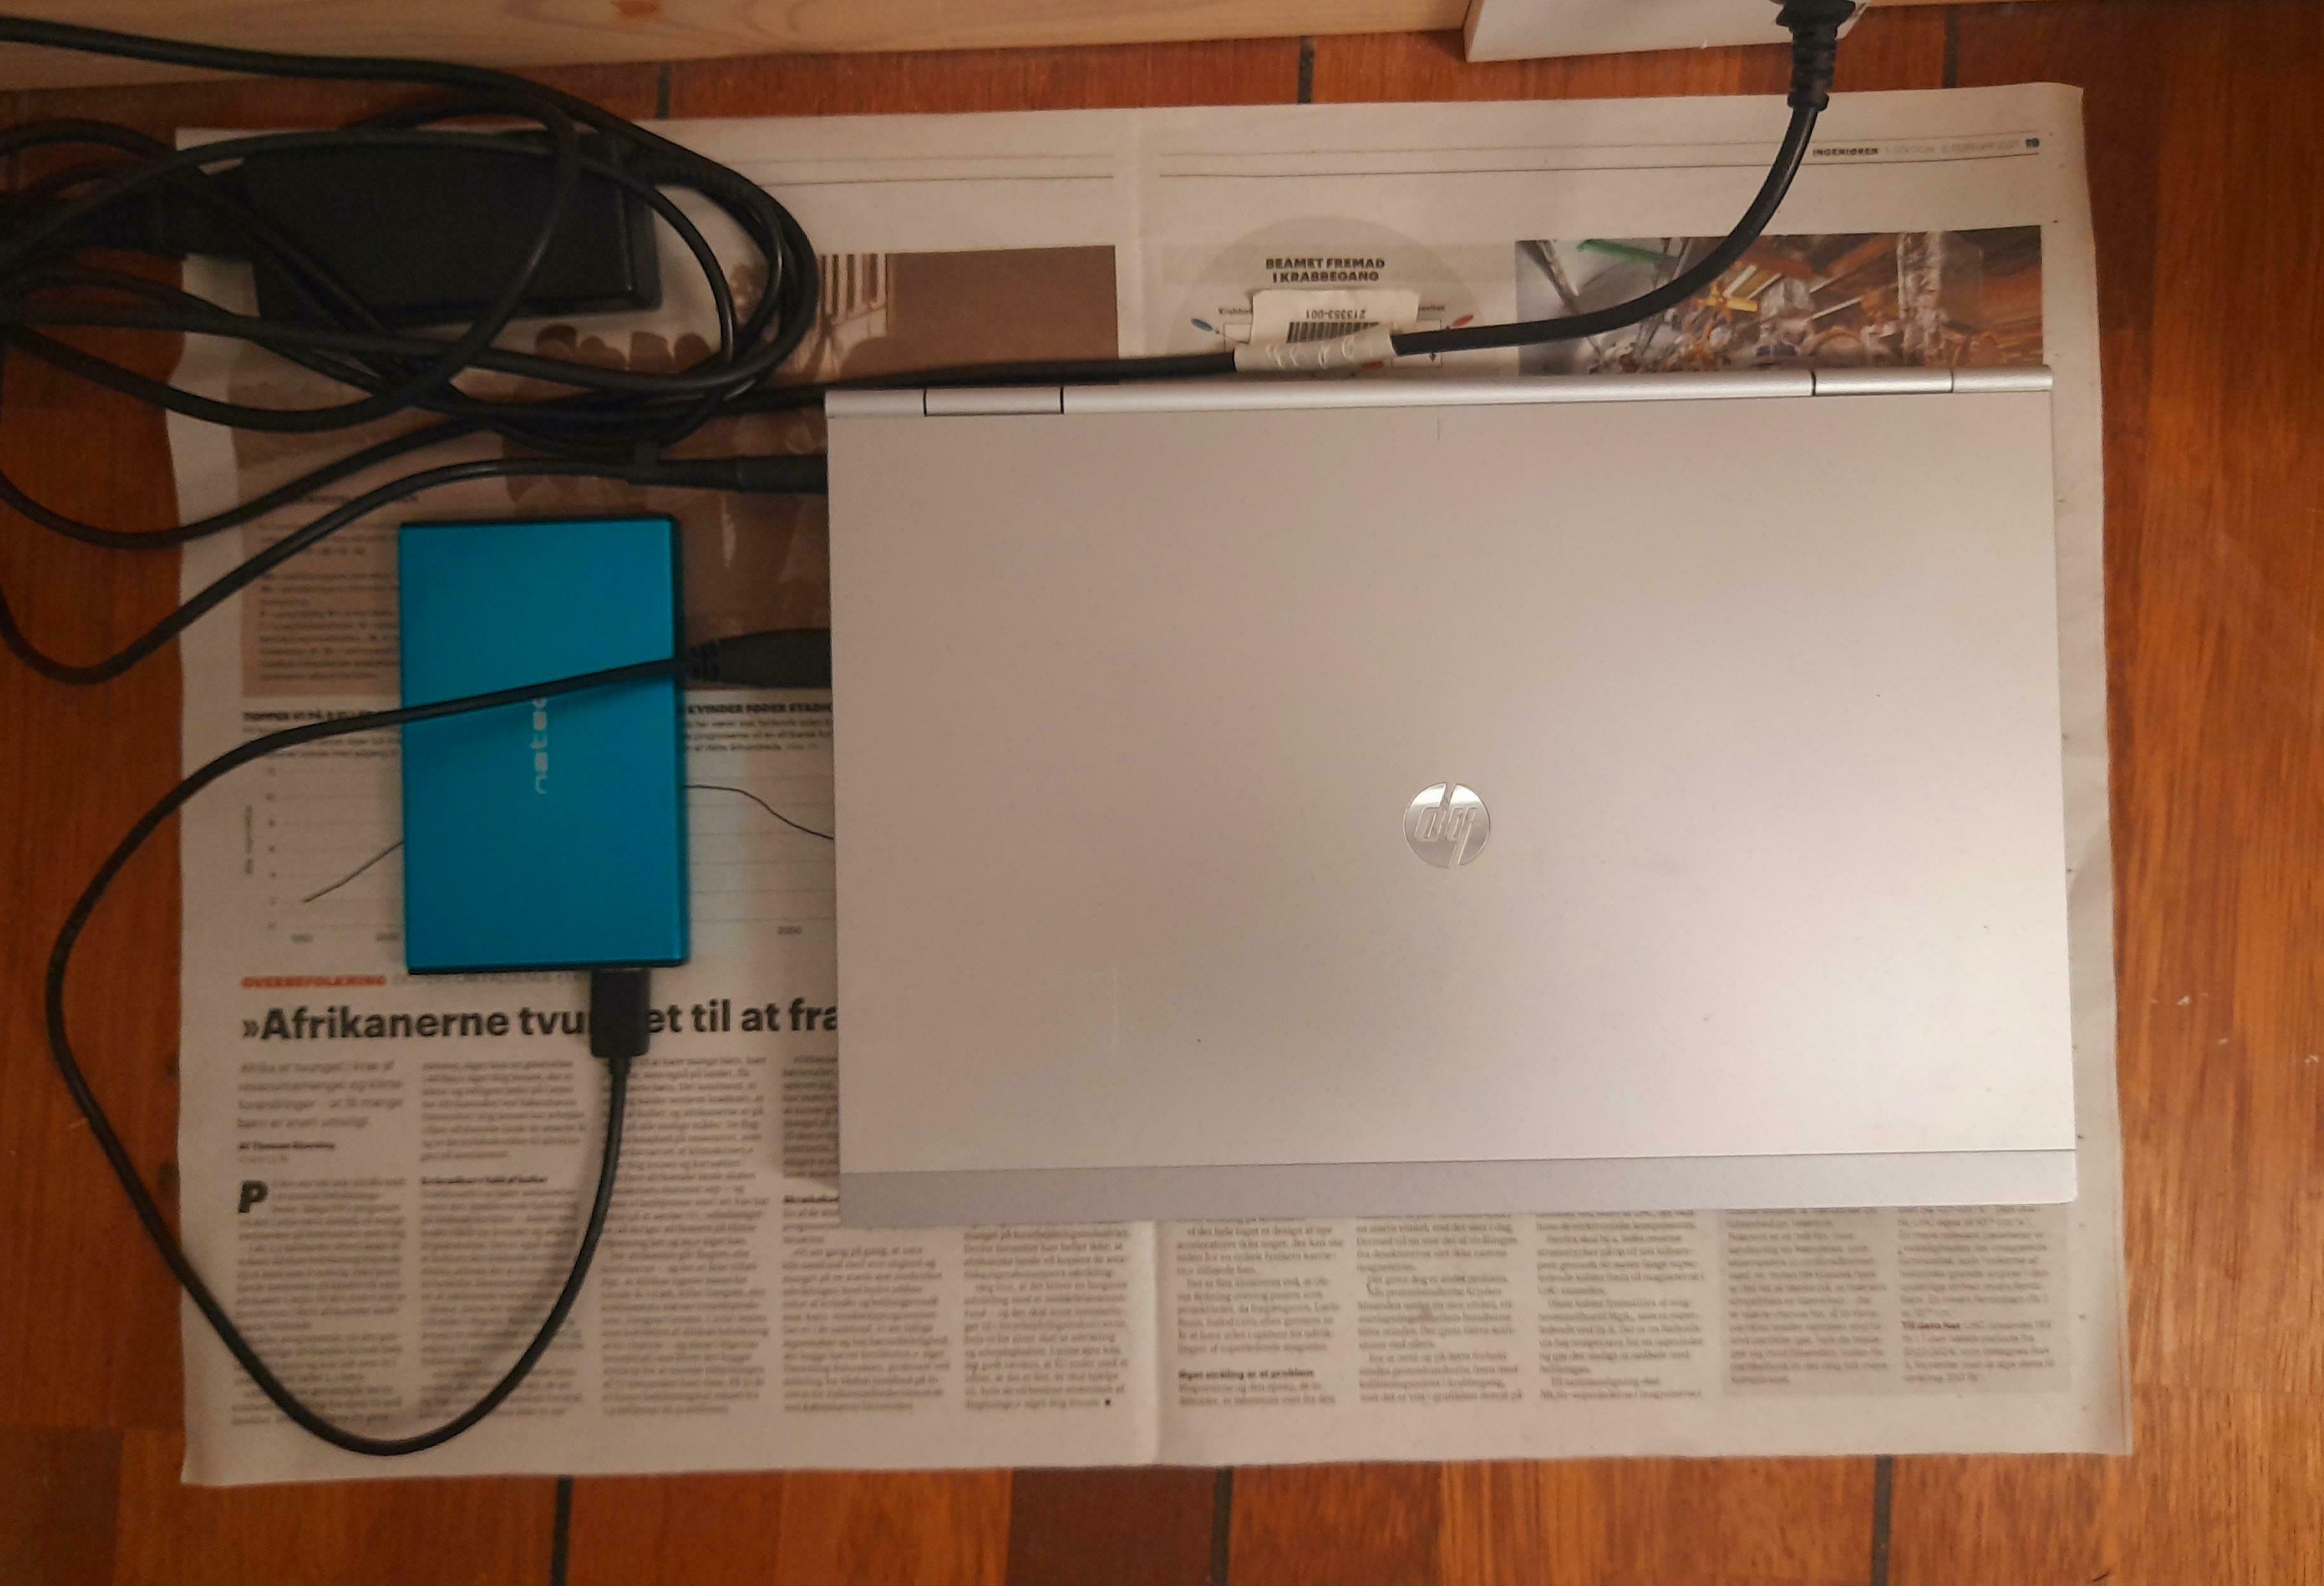
Before going all in by buying fancy hardware, I wanted to do a trial run with old hardware and see if it was something I wanted to do. My friend donated her old HP EliteBook 8470p as she had no use for it anymore. So, like any sane person, I removed Windows and installed Linux in it. I went with Arch Linux as it would only be my test server. I know some people run their server with Arch Linux, but that will probably not be me in the future.
 |
|---|
| HP Elitbook 8470p |
I just ran a Samba share for network file sharing and installed paperless-ngx in docker. paperless-ngx app came in handy many times to quickly access my personal documents. I used this server once for web scraping to find an appointment in my local municipality. So, I could already see the potential of self-hosting services and see myself tinkering with it.
As it might not be a great idea to add extra storage via USB, I decided to get better hardware with horsepower and expandability.
Homelab Hardware specification
I bought a used Supermicro X11SSL-CF Motherboard with Intel Xeon 1245 v6, 32GB ECC RAM and 64GB of SATA DOM. The Motherboard has 6 SATA slots and 2 Mini SAS HD slots. In addition, it has an LSI 3008 RAID controller for the SAS ports, which I plan to use in IT mode in the future so that all the disks connected via the SAS ports appear as individual HDDs. Unfortunately, the RAM that came with the Motherboard had issues, so I had to buy my RAM. More about how I discovered this issue later.
Storage:
I will use the 64GB SATA DOM for running my primary OS. My spare 500 GB Samsung SATA SSD will be used for fast storage and used as a cache layer with dm-cache. For now, I just got one 4TB Ironwolf NAS HDD as my primary storage. I am planning to buy one more and use one of them in RAID1. I am not a big data hoarder, so for now, 4TB of storage should be enough to get started. I have enough expansion ports in the Motherboard for future expansion.
| Component | Model |
|---|---|
| CPU | Intel(R) Xeon(R) CPU E3-1245 v6 @ 3.70GHz |
| RAM | 2 x 8GB Samsung ECC RAM (M391A1G43EB1-CRC) |
| Storage (OS) | SuperDOM 64GB |
| Storage (fast) | Samsung 870 EVO SSD - 500GB |
| Storage (slow) | 2 x IronWolf Harddisk ST4000VN008 4TB |
| Case | Fractal Node 804 |
Bringup
One issue with buying used components is component reliability. Generally, these server-grade Motherboards are designed to last long; still, there can be issues.
Before connecting the peripherals, I tried to do a bring-up test to see if I could reach the BIOS option. The board did nothing, and I went into panic mode that the board might be kaput, and I lost my money. I tried all the debugging steps mentioned in the Supermicro installation guide, and everything pointed towards replacing my Motherboard. Finally, after some hours of debugging, I discovered I didn’t connect my power supply properly (:facepalm:).
Once the system started functioning as intended, I tried booting into a Live ISO to check everything was properly detected by the OS. Then came the next issue; there were random kernel panics. Again, I panicked that the board might be kaput.
I was very confused because the kernel panics were random, and it was not reproducible. So, I decided to do a memtest that is part of Live USB ISO installer. To my surprise, it emitted a lot of memory errors as below:
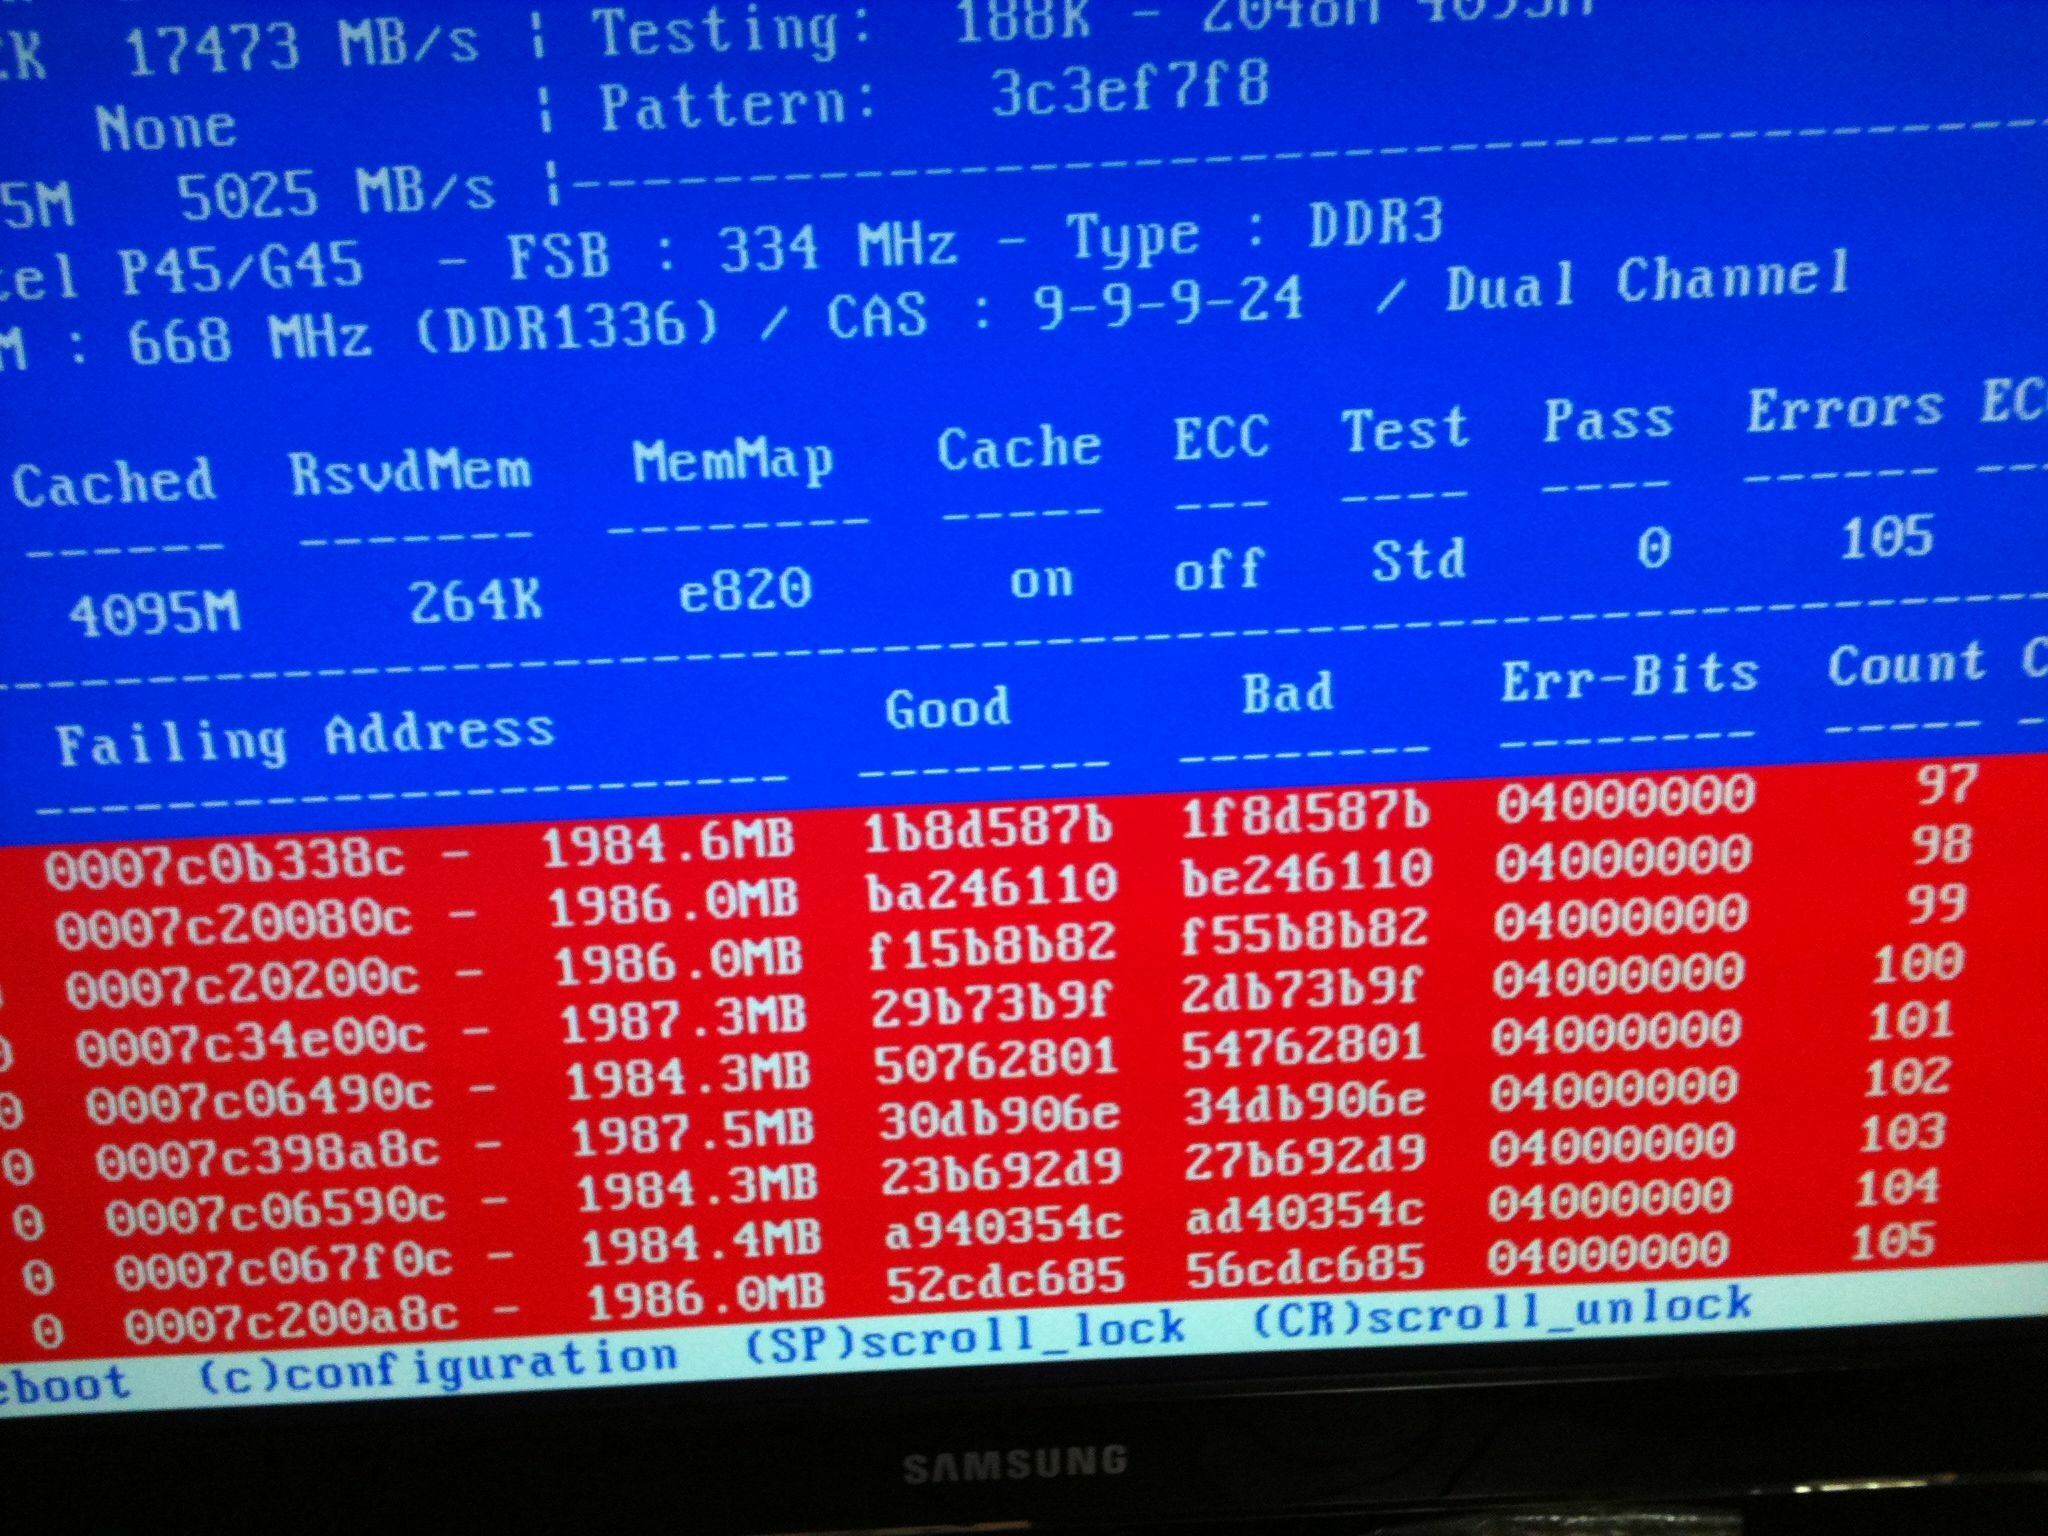 |
|---|
| Memtest errors (Image not from my server as I forgot to take a picture. Taken from here) |
So once I replaced the RAM, the random kernel panics did not occur anymore. Only one of the two 16G RAM sticks had an issue. I will probably reuse the other one later when I expand the memory.
I like the built-in IPMI in the Motherboard that allows me to operate the server without having it connect to the monitor, keyboard, etc. Even though there are alternatives such as Pi-KVM and TinyPilot that are DIY KVM, each cost at least 100 Euros (assembled version might cost around 300 Euros) with extra components lying around the server. So I am happy with the inbuilt IPMI to control my server remotely.
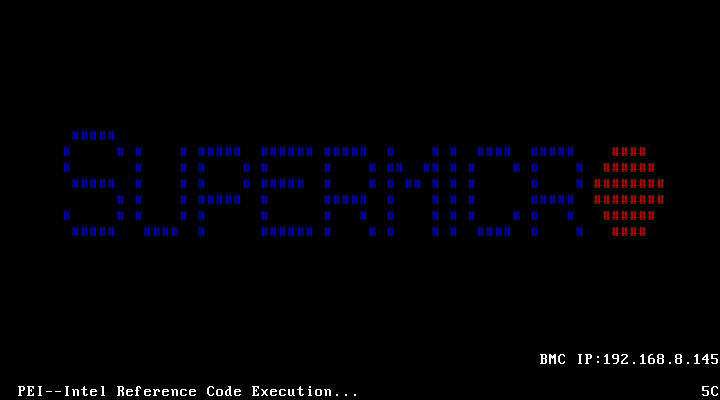 |
|---|
| IP-KVM |
Future plans
Hardware:
-
Change the LSI 3008 SAS controller from IR mode to IT mode (link)
This change disables the RAID functionality of the SAS controller, and it presents each drive individually to the host. It comes in handy when I want later use something like Proxmox and pass through the complete controller for some storage OS, such as TrueNAS to manage drives.
-
Add more RAM and storage
I didn’t want to oversize my hardware with RAM and storage up front. I also want to choose filesystem and software in such a way that I can gradually add more disks.
System software:
-
openSUSE as the primary OS
I am planning to install openSUSE Leap as my primary OS. I have heard good reviews about openSUSE Leap for servers. openSUSE’s default filesystem is BTRFS, which will be my primary filesystem to store data.
I initially thought of going with Proxmox as my hypervisor instead of installing OS in the bare metal. I might do that in the future, but I will go with the bare metal install now. Anyway, I am planning to deploy most of my software via docker.
-
Filesystem and redundancy
I will use a 2 x 4TB Harddrive in RAID1 with 100GB of SSD as a fast cache using dm-cache. I will be using BTRFS as my primary FS to store data. I am familiar with BTRFS, and its snapshot functionality is incredible. If I decide to add extra storage, I will go with Mergerfs and Snapraid combo, with each drive having its fast cache and formatted with BTRFS. It allows me to scale as I need.
I am also keeping an eye on RAIDz expansion feature that might be coming to ZFS soon which might give me motivation to try a storage OS such as TrueNAS.
Conclusion
I had a lot of fun researching, finding, and assembling my server. But, I suppose the real fun will begin once I start installing applications. I initially intend to try out different stacks: with and without virtualization, different filesystem layouts, different backup strategies, etc.
I will probably have more blog articles in the future about my software setup and the applications I will deploy.
That is it for now. Happy Homelabbing!!
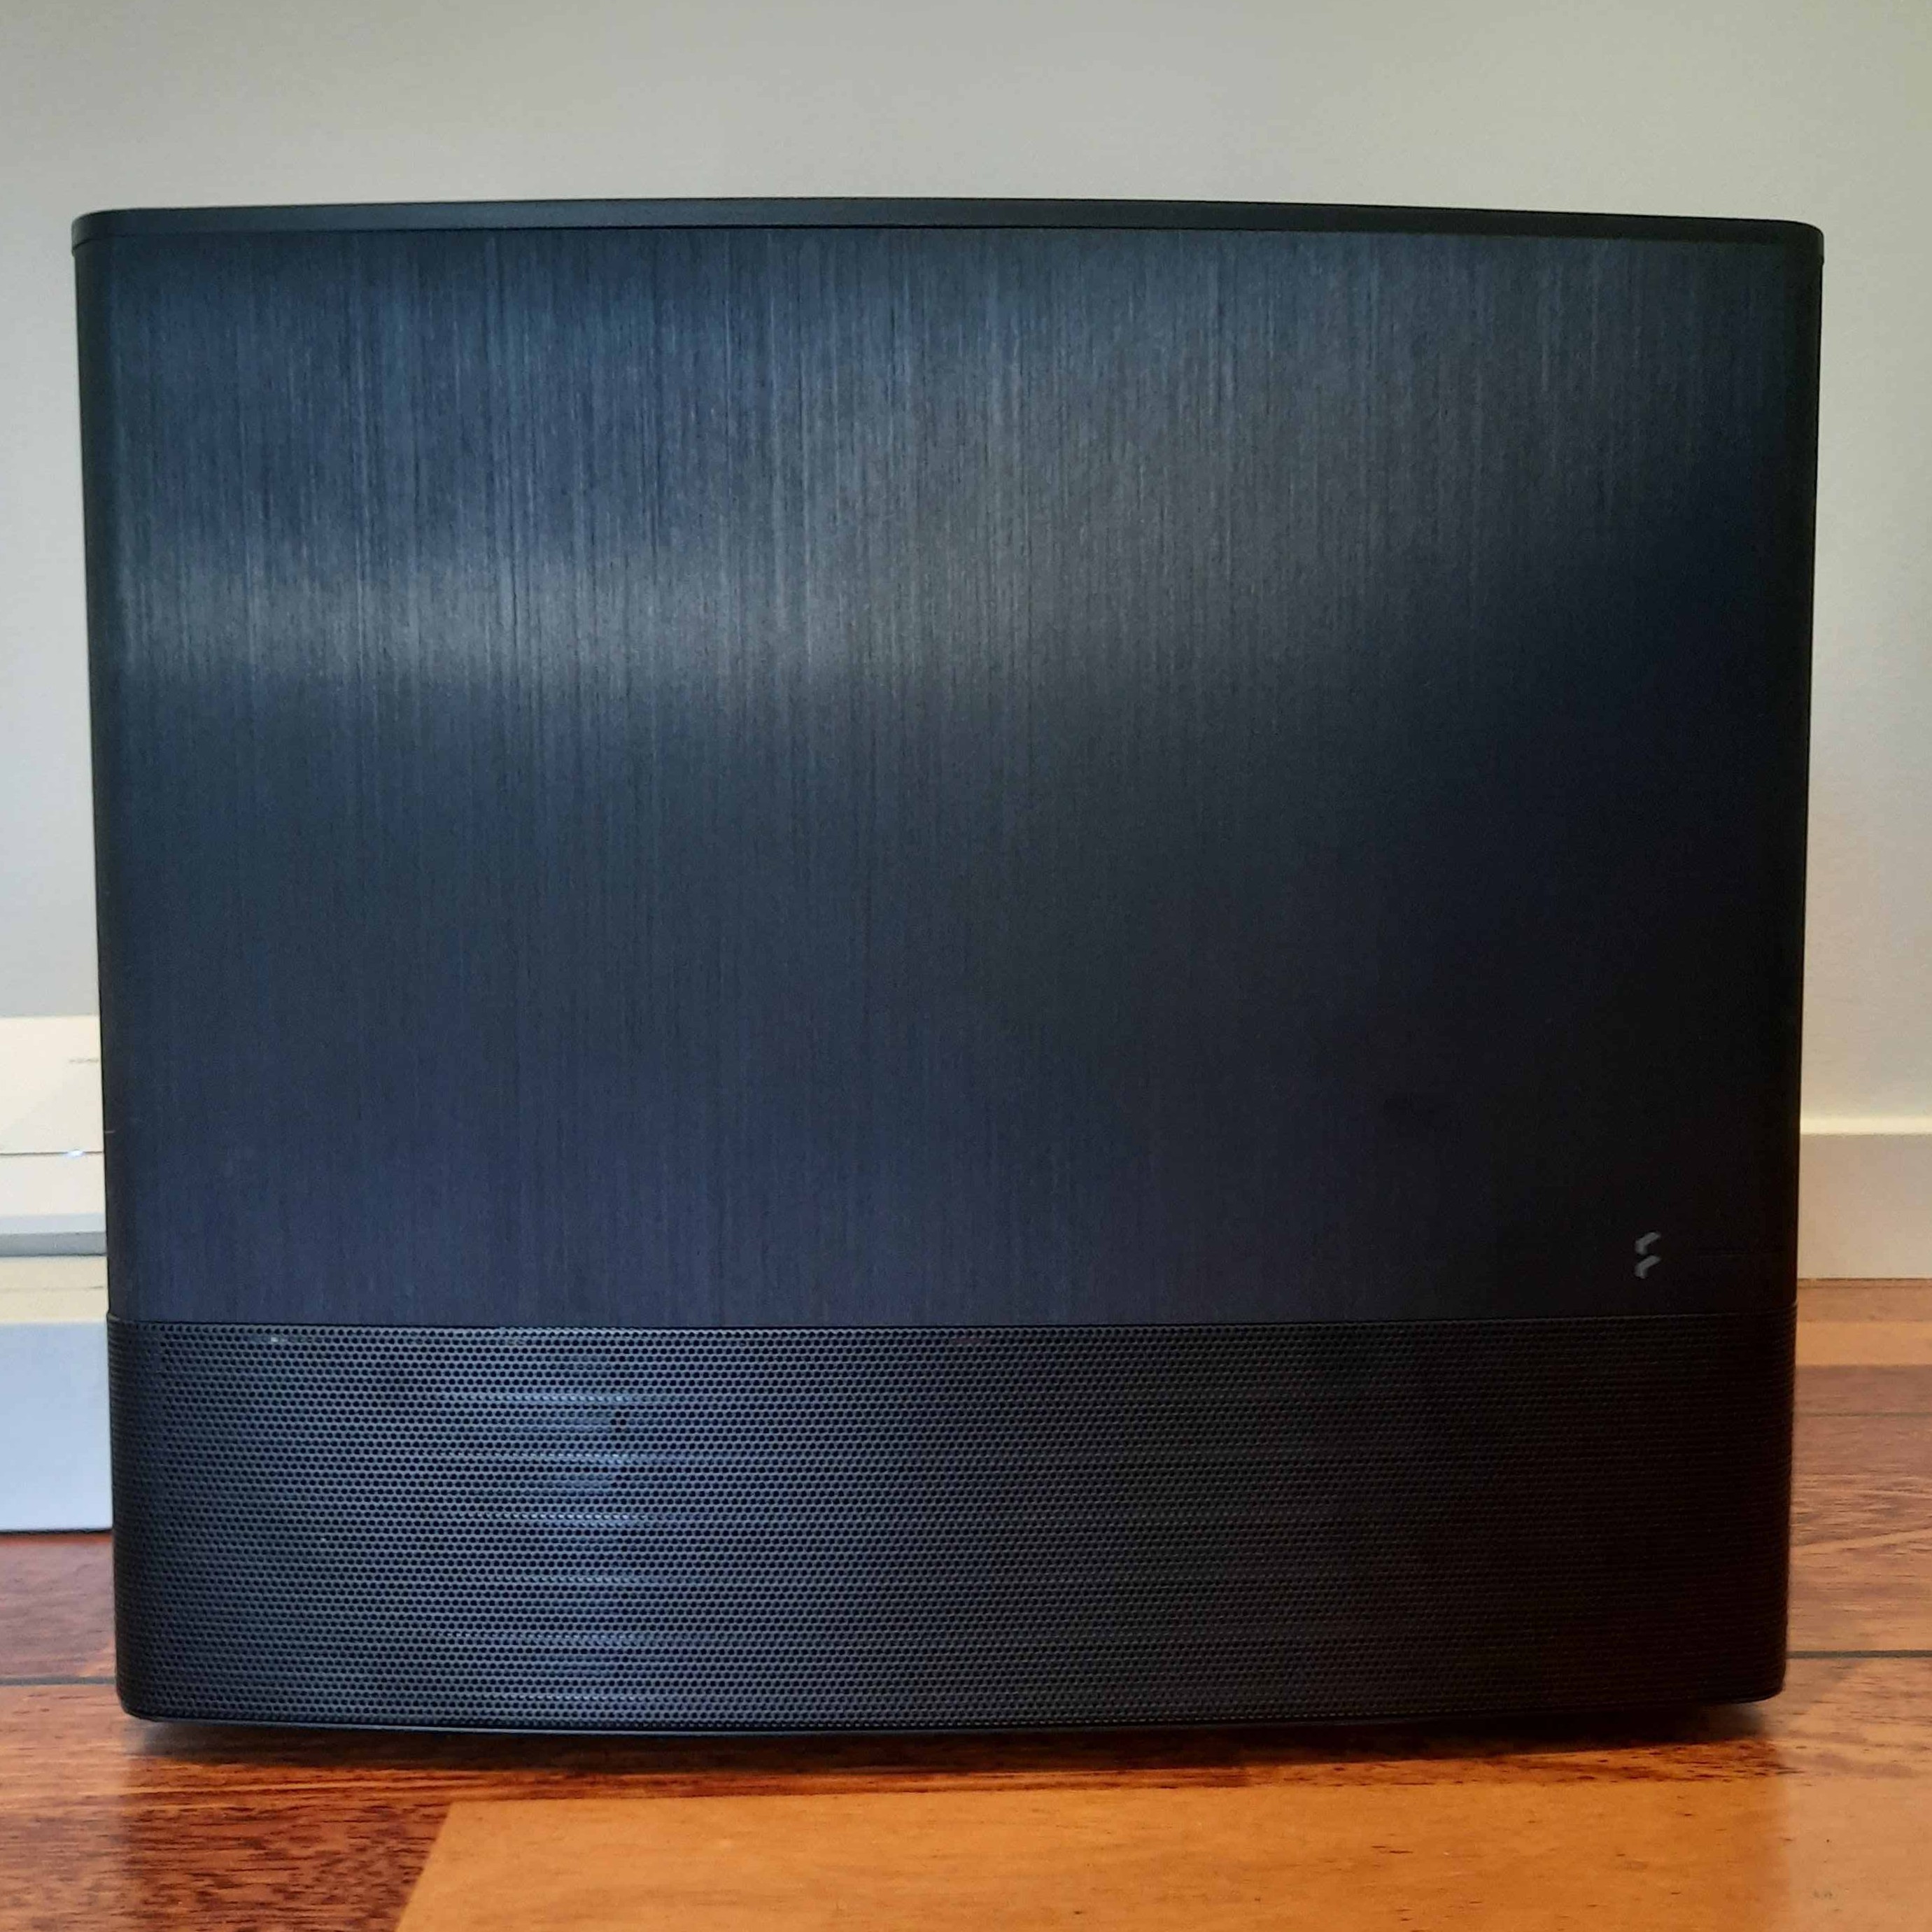 |
|---|
| Fully built supermicro server |